![]()
Adding System Calendar Events
Note: You must log in to Ektron CMS400.NET and have permission to edit events in the calendar folder. See Also: Setting Permissions through the Permissions Table
This section also contains the following topics.
Step 1 - Use the Edit Appointment page
Step 2 - Edit the Event Title, Location and Description
Step 3 - Change the Start Time and the All Day Option
Step 5 - Select a Taxonomy Category
Step 6 - Set Metadata for the Event
Setting Calendar Events with Approval Chain Workflow
Showing Calendar Events on Activity Streams
Step 1 - Use the Edit Appointment page
To add or edit a system calendar event, follow these steps
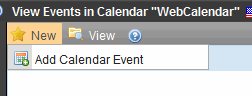
1. Navigate to your calendar from
the Web page containing the calendar
or
the Workarea > Content Tab and select the calendar folder
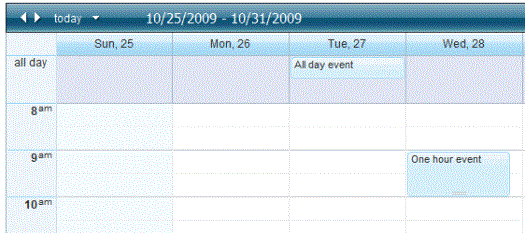
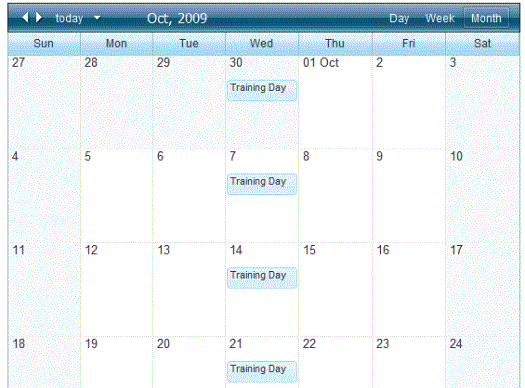
2. Double click any day to add a new event for it. The example below adds an event to the 27th of the month.
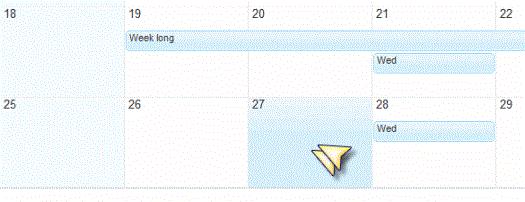
3. The Edit Appointment screen appears.
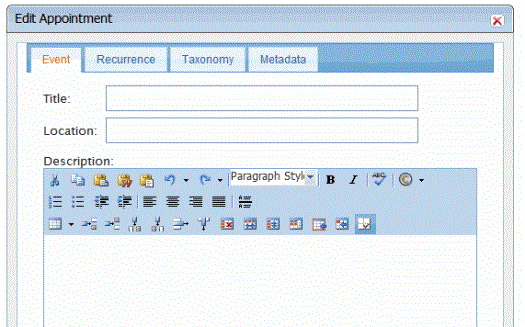
Step 2 - Edit the Event Title, Location and Description
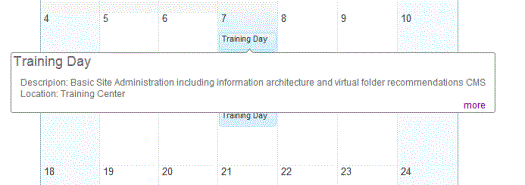
1. Enter the event title into the Title text box. “Training Day” for example. The title appears on the calendar and in the pop-up.
2. Enter the Location. This appears in the pop-up.
3. Enter the Description. This appears in the pop-up.
Hover over the event to see these fields, as shown below.
You may customize this pop-up. See Customizing the Web Calendar Tooltip.
Step 3 - Change the Start Time and the All Day Option
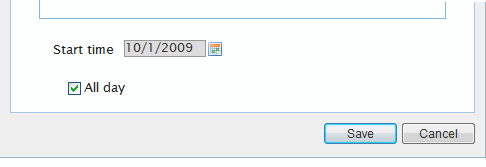
At the bottom of the Edit Appointment page, notice that the selected date appears as the Start Time, and All Day is checked as the time.
All-day events appear differently than those with start and end times. For example, in a weekly view, all day events appear at the top, while ones with start and end times appear in their time slot, as shown below.
To change the start and end date/time, follow these steps.
1. Uncheck the All Day checkbox to add the time of day.
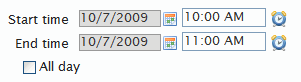
2. For start date, click Calendar ( ) and set the start date.
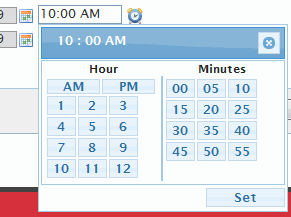
3. For start time, enter the time text or click Clock ( ).
).
4. If you use the clock button, choose the values and click Set when finished.
5. To set the end date and time, repeat steps 2-4.
Time Zones for Events
Ektron CMS400.NET stores event times in the Ektron CMS400.NET database as UTC (also known as Greenwich Mean Time - GMT). For members or visitors that login, events show in the member’s time zone. For visitors that do not log in, events show in the Web server’s time zone.
For information about setting the User time zone, see Time Zone Field.
Step 4 - Set Recurrences
Appointments can be set to recur daily, weekly, monthly, or yearly. They can be spaced at various intervals and have a finite duration or recur indefinitely.
Follow these steps to set a recurrence for a weekly event each Wednesday for the next 5 weeks.
1. Click the Recurrence tab on the Edit Appointment window.
2. Check the Recurrence checkbox, as shown below.
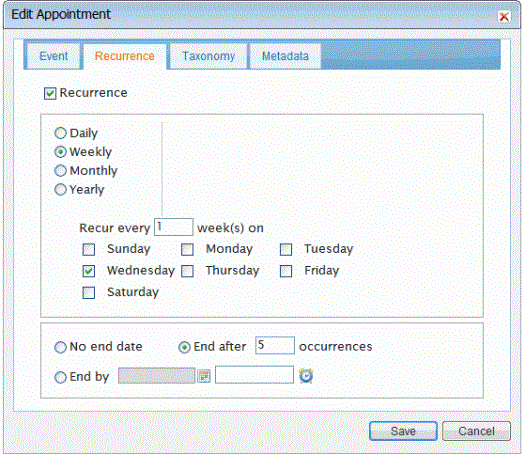
3. Click Weekly.
4. Enter 1 to set the recurrence to occur every week.
5. Click Wednesday.
6. Enter 5 to end after this many occurrences.
7. Save your changes.
Editing a Recurring Appointment
When you edit a recurring event, you see the following prompt.
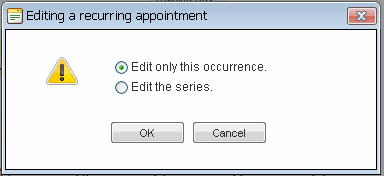
Edit only this occurrence to change just one event. Edit the series to change all events.
Step 5 - Select a Taxonomy Category
A typical calendar taxonomy screens events that a site visitor might wish to see. For example, a college sports Web site might show all sports, but the visitor may want to only view football games.
To show only events related a specific category on your calendar page, use a Taxonomy. See Also: Taxonomy.
Follow these steps to apply taxonomy categories to an event.
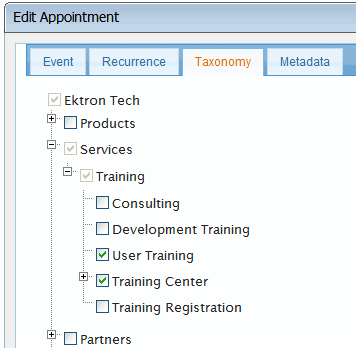
1. Click the Taxonomy tab on the Edit Appointment window.
2. Check the appropriate categories.
The example below selects the User Training and Training Center categories.
See Also: Using a Taxonomy Filter for Calendar Events
Step 6 - Set Metadata for the Event
Each event can have metadata associated to it. To learn more about metadata, see Working with Metadata.
In the example below, a map address is associated with an event so that the event’s location can show on a map. See Also: Map Server Control
To set the metadata, follow these steps.
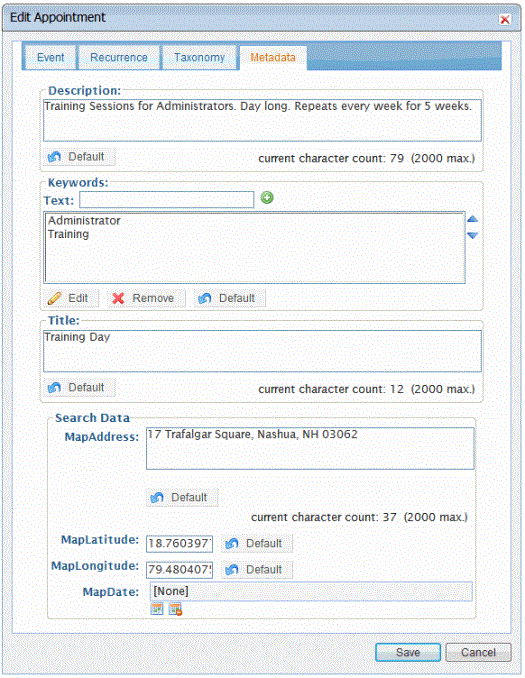
1. Click the Metadata tab on the Edit Appointment window.
2. Fill in the Metadata values in the fields provided.
An example of metadata fields for an event is shown below.
Save Your Appointment
At any time, click Save to display it on the Calendar.
When you finish, the calendar looks like this.
Setting Calendar Events with Approval Chain Workflow
To set an Approval Chain for Calendar events, follow the same instructions as other content. For more information about Workflow and Approval Chains, WorkFlow.
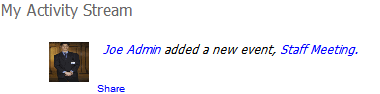
Showing Calendar Events on Activity Streams
A new or updated Calendar event appears on a Community Activity Stream if the following notification settings are checked on a user's or Membership Group's Profile > Activities tab.
Add Calendar Event
Update Calendar Event
Add Calendar Event
Update Group Calendar Event
For more information, see Notifications.


![]()